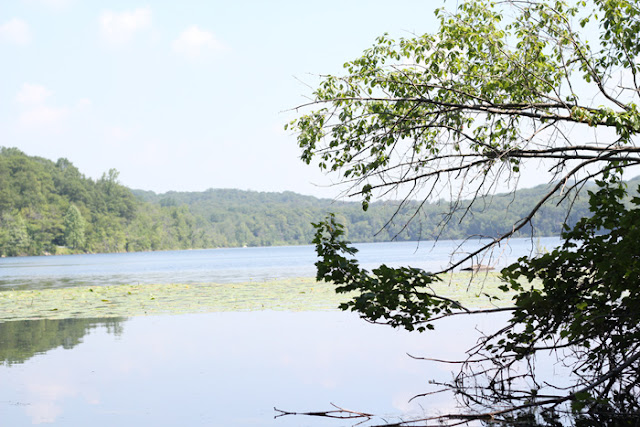
I don't know about you, but often I take a photo of a gorgeous landscape and when I look at the photo later on my computer, I am underwhelmed. Usually the sky is washed out ... it is just not as blue and bold as I had remembered.
Unfortunately, your camera and your eye do not see things the exact same way ... but there are tricks and techniques to spruce up your photos. My usual go-to application is Photoshop. But I also love the ease, speed and power of Adobe's Camera Raw software. Let's call it ACR for short.
Here is a snippet of a digital scrapbook layout that I will be sharing with you next week. Imagine this series of photos with the washed out version of my landscape photo in the center frame, instead of this high impact version. It's such a tiny little series of photos, that the original landscape image straight out of camera, would have been lost among the other two bold, colorful photos.
So, I turned to ACR to fix the image below, and help it better match the mood and feel of the other two images shot that afternoon.

In ACR, you can edit images that are not RAW files. The original image was shot as a .jpg. I use Adobe Bridge, shown below, to view and organize my photos. To open this .jpg image in ACR, I simply highlight my photo(s) in Bridge and press CMD R (CTRL R on a PC), or I can go to File>Open in Camera Raw.
This brings up my ACR window with the image (or images) that were highlighted.
I did some very basic editing and straightening of this photo. I'm not going to go over all the edits I would do in Camera Raw in this mini lesson, but I highly recommend Lynda.com for training, if you are interested in learning more about this program.
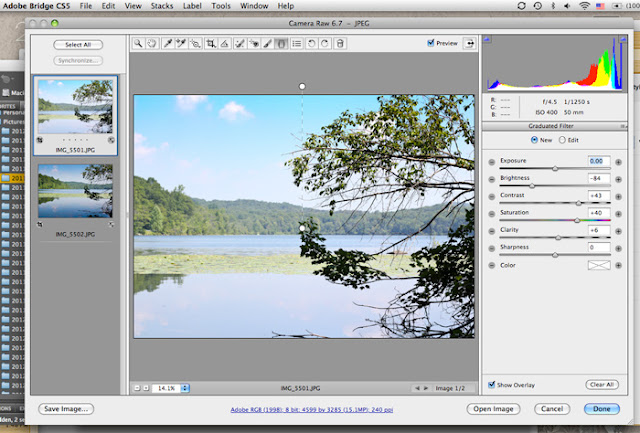
The purpose of this tutorial is to focus on how we can quickly and easily add some real drama to our sky and our sky's reflection in the water. To do this, we are going to use the Graduated Filter Tool (G), shown below in red.
Once you click on the Graduated Filter button, your ACR window will change slightly. A new right side panel will be displayed.
For this image, I want to work with the sky (top half of the image) first. Holding down Shift (this will keep your line straight and thus the filter overlay straight), click on the very top of the photo (green circle), or slightly above it, and drag to the area where you want the effect to end (shown with the red circle). I choose the mountains at the horizon line.
Then start to play with the sliders in the right side panel. So, for this image, I know I want to increase my colors and saturation of the sky. I don't want the sky to be so bright and washed out. I moved the Brightness slider to the left to decrease the brightness and darken up the sky. I also increased the saturation and contrast, by moving those sliders to the right. Play around to get the effect you find pleasing.
Below is a random example of the panel, and its sliders, close-up. These are not the settings I used for this image. I just wanted you to be able to see the details.
(The settings I settled on: -84 Brightness, +43 Contrast, +40 Saturation and +6 Clarity. I really wanted to almost "over-do" the effect for this tiny photo. I needed it to better match the intensity of the two other images. If this photo were to be blown up or printed and framed, I would have definitely toned it down!)
* Remember only the pixels in that red to green zone will be changed, and it is done gradually from green/darkest or strongest effect down to the red/lightest or weakest effect.
Once you are happy with the sky, click on the New button in the right side panel, to set the sky's graduated filter and begin working on a new filter for the reflection in the water. See image below, the red/green dots have gone white, indicating they are "set" and that you are now ready to create a new graduated filter.
Now, let's create the Graduated filter for the reflection using the same series of steps. Since this is a reflection, we will reverse our starting point (green circle) and place it at the very bottom of the photo or slightly below. This will be the darkest part of the graduated filter's effect. We want it to mirror what we see above in the sky. So, holding down Shift, click near the bottom of the photo (my green circle) and drag to the point where you want the effect to end (my red circle). I choose to end my effect near the horizon, where the water meets the mountains. The end click is the red dot and the lightest of the graduated filter's effects. See my red/green clicks below.
Again, play with the sliders to get the effect you want. For my photo, the tree on the right gives me some valuable information about the lighting in my photo. The tree branches and leaves on top are much lighter and brighter than the ones near the bottom of the photo. So I choose to make the water area even deeper and darker than the sky. I moved my Exposure slider to the left to make the water graduated filter darker than my sky.
(The settings I settled on: - 15 Exposure, -80 Brightness, +43 Contrast, +35 Saturation and +6 Clarity.)
*Note: Your filter lines do not need to be a straight line, up and down. You can drag at angles. You can drag across the photo (ex. left to right). If you do not want a straight line, do no hold down the Shift key. Experiment. Play. You can also use this technique to lighten photos that have been underexposed, by increasing the Brightness (and perhaps the Exposure slightly).
My final landscape image using just a few clicks in Camera Raw. Blue, bold and beautiful!
If you decide to give this a try on your own photos, I'd love to see what you create! Feel free to share a link!
Hope you enjoyed the tutorial.
xoxo -jenn


1 comment:
This is such a great tutorial. I don't use Photoshop or Adobe. I have Lightroom, but I'm sure I can do the same thing. I've seen the filter option thing before + didn't know what it did. This is so helpful!
Thank you!
Post a Comment